The left part of the application window is occupied by the code editor and associated user interface. Most people working with tools for program construction in any capacity will be familiar with the structure visible here, but we'll briefly look at the components making up this area:
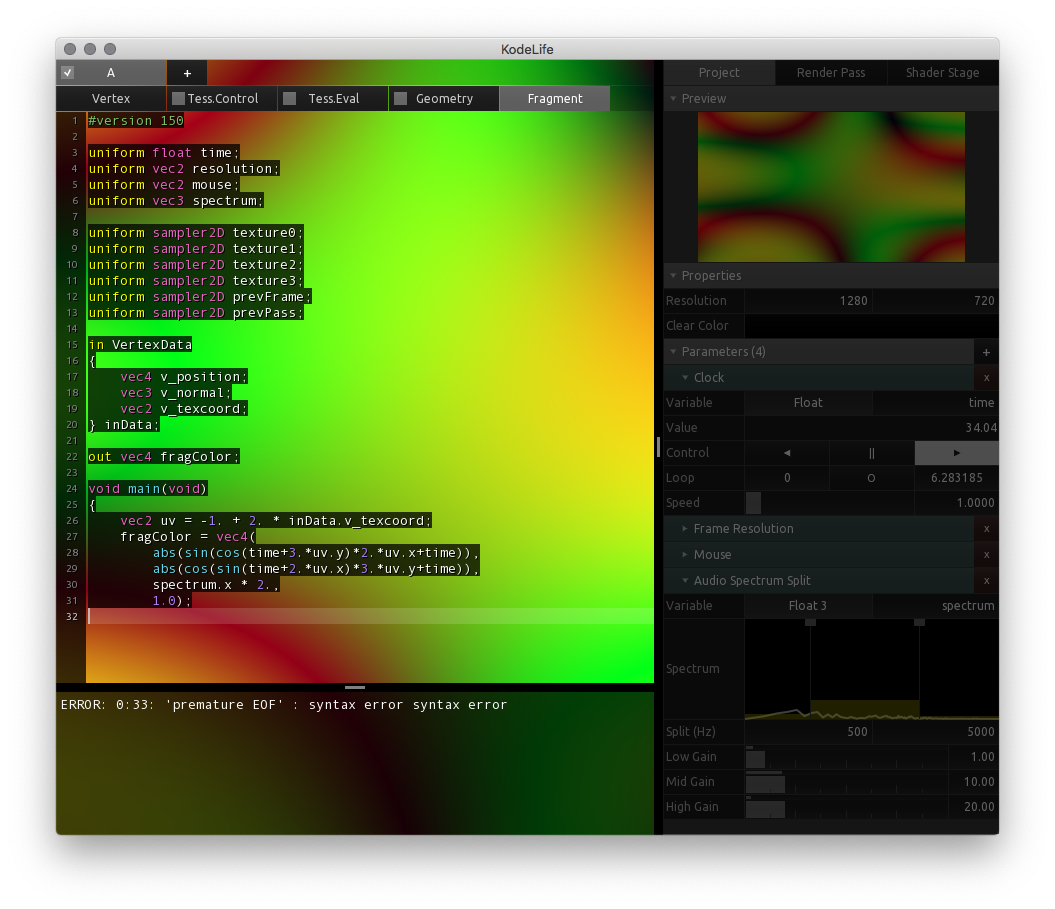

At the very top is the tab bar, which allows to switch between two levels of a project's structure. The tab bar can be completely hidden from either the Editor Preferences or from the menu bar's View menu.
The first level is the pass level, where you can
For a discussion of KodeLife's pass concept and associated options, please see Pass in the Kontrol Panel section.
The second level allows to switch between the source code for the different shader stages of any given pass.
The number of available stages here might differ depending on the graphics API you have enabled in the Preferences, the type of pass, and which shader stages are supported by your GPU's driver, version and configuration.
KodeLife will automatically create a tab for all shader stages supported by the current graphics API and driver and pass type, but it is possible to hide unwanted shader stages' tabs in the Kontrol Panel's Shader Stages list, to focus only on the ones required for your project.
It is also possible to switch between passes and shader stages using the following keyboard shortcuts:
The main editing area is where the shader source code can be modified and where most of the work/magic happens.
KodeLife's editor tries to assist as much as possible by highlighting syntax, indicating error lines and completing common shading language constructs as you type. The behavior and appearance of this area can be customized in many ways in the Editor Preferences and menu bar's View Menu.
As it might come in handy in certain situations and applications, there even exists a Built-in Parameter that can generate a rendered image of the currently active editor's contents for use as a texture input to your shaders.
Besides the usual editing key combinations, such as copy/paste/select/find/etc, the code editor also provides some additional, useful keyboard shortcurts:
macOS only:

The output panel is a text area where messages returned by the graphics API's shader compiler are displayed.
This could be general messages, warnings or errors. These messages are very specific to the operating system, version and type of the enabled graphics API, brand and vendor of your graphics card and the installed driver. Changing any of these will probably result in completely different messages, even for the exact same shader source code!
The output panel can also be completely hidden from either the Editor Preferences or in the menu bar's View Menu.